Braces might seem like just another part of your daily routine but there is a lot more happening beneath those wires and brackets than most people realize. Studies show that up to 60 percent of people with braces develop some degree of gum inflammation or tooth staining during treatment. Most assume a quick brush and rinse are enough. The real key to keeping your smile healthy lies in a few lesser-known daily habits that can make all the difference.
Table of Contents
- Step 1: Gather Essential Cleaning Tools
- Step 2: Rinse Your Mouth and Braces
- Step 3: Brush Your Teeth and Braces Thoroughly
- Step 4: Use Floss or Interdental Cleaners for Gaps
- Step 5: Rinse Again for a Fresh Finish
Quick Summary
| Key Point | Explanation |
|---|---|
| 1. Assemble essential cleaning tools | Gather soft-bristled toothbrush, toothpaste, floss threaders, and interdental brushes before cleaning for effective braces care. |
| 2. Rinse your mouth before cleaning | Use lukewarm water or fluoride mouthwash to dislodge food particles around braces and prepare for thorough cleaning. |
| 3. Brush meticulously around braces | Use a soft-bristled toothbrush at a 45-degree angle, cleaning each tooth and its surrounding area to prevent decay. |
| 4. Use floss threaders for gaps | Employ floss threaders and waxed floss to clean between teeth effectively, avoiding damage to brackets and wires. |
| 5. Final rinse with fluoride mouthwash | Perform one last rinse with fluoride mouthwash for added protection against decay, avoiding food for 30 minutes afterward. |
Step 1: Gather Essential Cleaning Tools
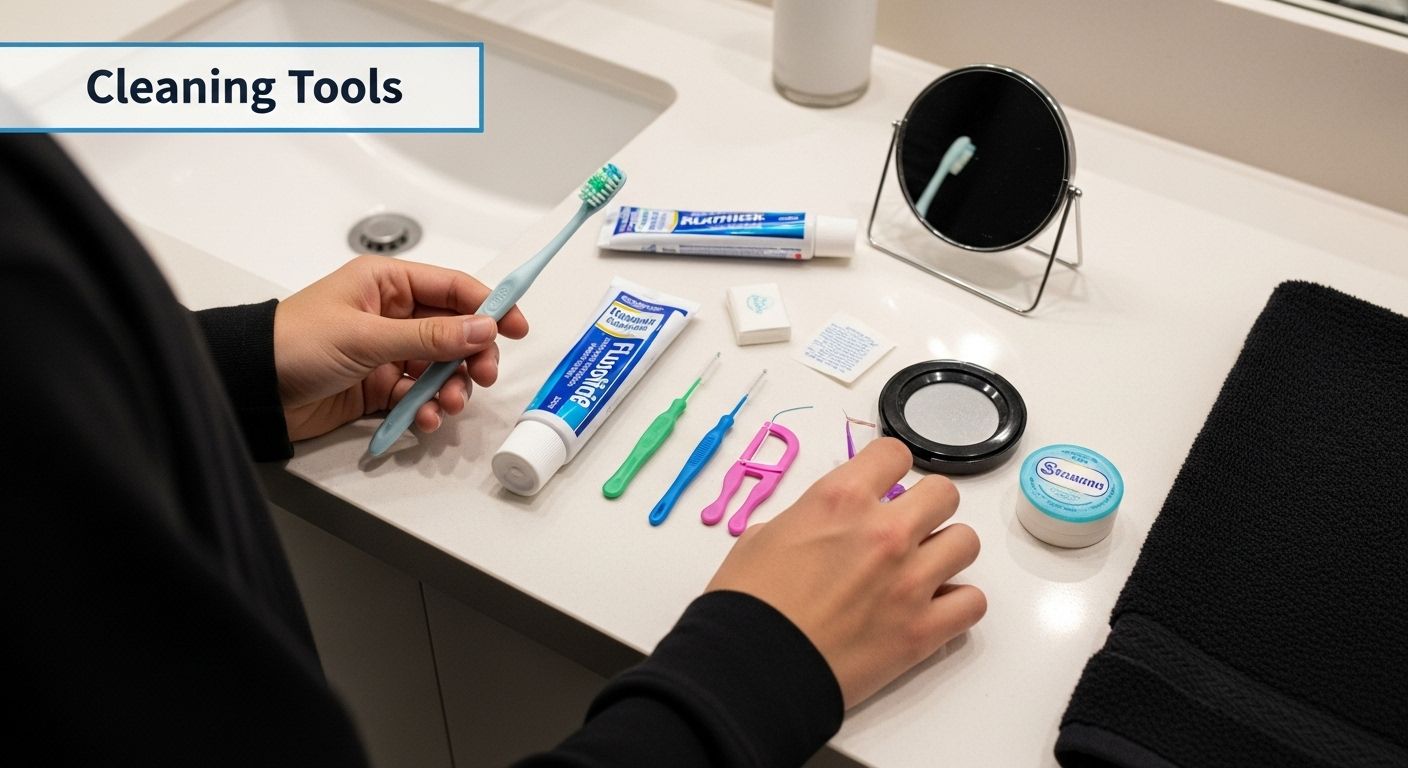
Keeping your braces clean requires having the right tools ready before you start your oral hygiene routine. Before diving into the cleaning process, assembling a comprehensive dental care kit will make maintaining your orthodontic investment significantly easier and more effective.
Essential Tools for Braces Cleaning
Your braces cleaning toolkit should include several specialized items designed to navigate the unique challenges of cleaning around brackets and wires. Start by selecting a soft-bristled toothbrush with a small head that can easily maneuver around orthodontic hardware. Electric toothbrushes with orthodontic brush heads work exceptionally well, providing thorough cleaning without damaging delicate braces components.
Professional orthodontists recommend collecting these specific cleaning instruments:
- Soft-bristled manual or electric toothbrush
- Fluoride toothpaste
- Interdental brush or proxy brush
- Orthodontic floss threaders
- Dental wax (for managing initial discomfort)
- Compact mirror for precise cleaning
Floss threaders are particularly crucial for navigating under wires and between teeth. These thin, flexible tools allow you to thread dental floss underneath orthodontic wires, ensuring you can clean areas that would otherwise be difficult to reach. Learn more about our comprehensive oral hygiene recommendations for braces patients.
When selecting toothpaste, choose a fluoride-based formula that helps prevent tooth decay and strengthens enamel. Avoid whitening toothpastes, as they might create uneven coloration around your brackets. Consider purchasing travel-sized versions of these tools so you can maintain your oral hygiene routine even when away from home.
By gathering these tools before beginning your cleaning routine, you set yourself up for successful braces maintenance. Each tool plays a specific role in keeping your teeth and orthodontic appliances clean, preventing potential issues like plaque buildup, tooth decay, and gum inflammation.
Here is a quick reference table of essential tools and their purposes, helping you build an effective braces cleaning toolkit.
| Tool | Purpose |
|---|---|
| Soft-bristled toothbrush | Gently cleans around brackets and wires |
| Fluoride toothpaste | Helps prevent tooth decay and strengthens enamel |
| Interdental brush | Reaches areas between brackets and wires |
| Orthodontic floss threader | Enables flossing under wires and between teeth |
| Dental wax | Reduces initial discomfort from brackets and wires |
| Compact mirror | Assists in precise inspection and cleaning |
Step 2: Rinse Your Mouth and Braces
Rinsing is a critical first defense in maintaining clean braces and preventing food particle buildup. This step acts as an initial cleansing mechanism, helping to dislodge loose debris and prepare your mouth for more thorough cleaning. Explore our comprehensive guide to oral hygiene for braces patients to understand the importance of this fundamental step.
Selecting the Right Rinsing Technique
Begin by choosing lukewarm water for your rinse. Water that is too hot or cold can cause discomfort, especially if you have sensitive teeth or recently adjusted braces. Take a small sip and gently swish it around your mouth, focusing on creating a gentle, circular motion that allows water to flow between brackets, wires, and teeth.
The goal of rinsing is to mechanically remove loose food particles before they can harden or cause potential staining. Pay special attention to areas around brackets and under wires where food tends to accumulate. Tilt your head slightly forward and to the sides to help water reach different angles of your mouth. This technique ensures comprehensive coverage and helps dislodge particles that might be stuck in hard-to-reach places.
Effective Rinsing Strategies
Consider these key rinsing techniques for optimal results:
- Rinse immediately after eating, whenever possible
- Use gentle, circular swishing motions
- Aim water between brackets and along the gumline
- Spit out water completely after rinsing
If plain water feels insufficient, you can occasionally use an orthodontist-recommended alcohol-free, fluoride mouthwash. These specialized rinses provide additional protection against bacteria and help maintain oral hygiene. However, water remains the most gentle and universally recommended rinsing solution.
After rinsing, check your mouth in a mirror to confirm that visible food particles have been removed. Your mouth should feel clean and refreshed, with no visible debris around your braces. This simple yet crucial step sets the foundation for thorough brushing and flossing, helping you maintain healthy teeth and gums throughout your orthodontic treatment.
Step 3: Brush Your Teeth and Braces Thoroughly
Brushing with braces requires a more deliberate and systematic approach compared to traditional tooth cleaning. This critical step removes food particles, prevents plaque buildup, and protects both your teeth and orthodontic hardware from potential damage. Explore our comprehensive oral hygiene recommendations for braces patients to ensure optimal care.
Mastering the Brushing Technique
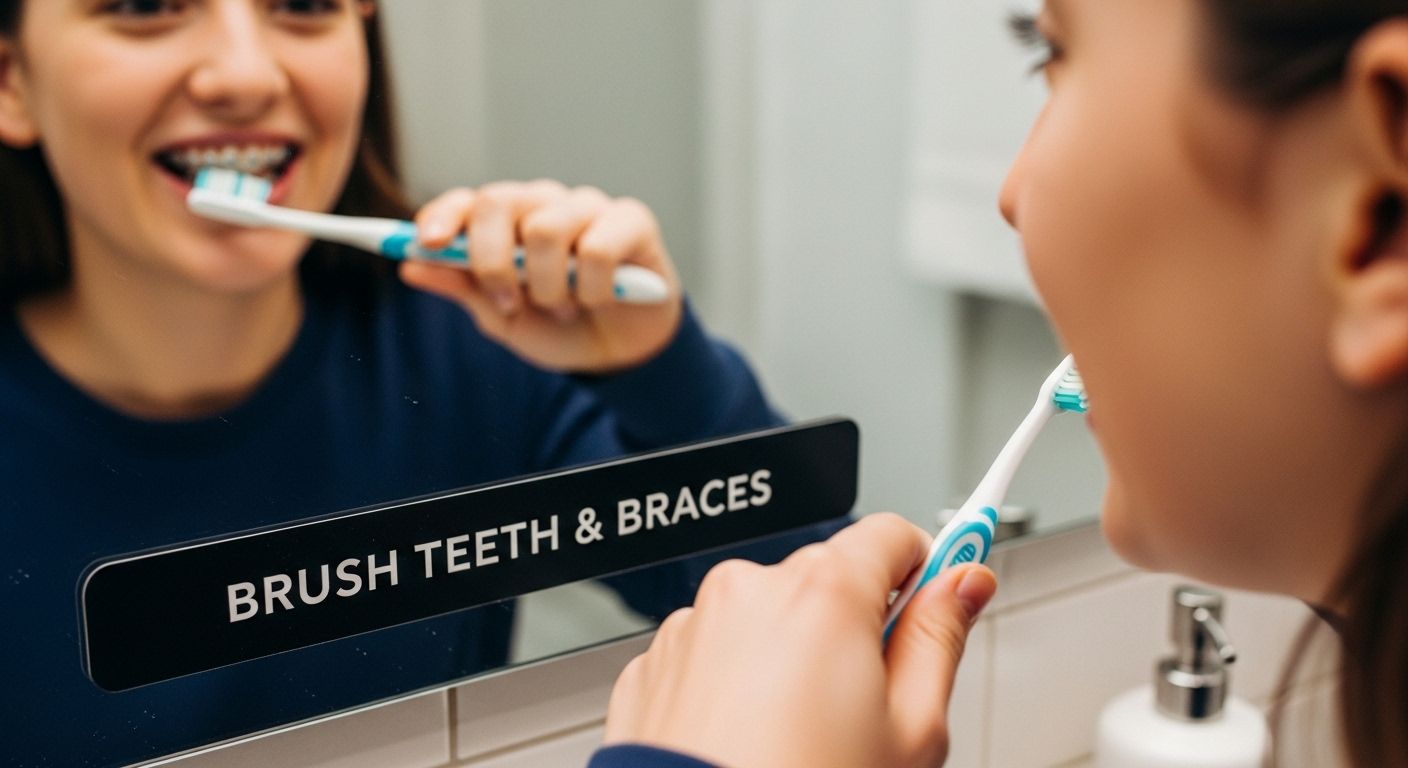
Position your soft-bristled toothbrush at a 45-degree angle to your gumline, creating the most effective cleaning position. Start by applying a pea-sized amount of fluoride toothpaste to your brush. Begin with the outer surfaces of your teeth, moving the brush in gentle, circular motions around each bracket. The goal is to clean not just the tooth surface, but also the area immediately surrounding the metal or ceramic brackets.
Focus on cleaning each tooth individually, spending approximately 10 seconds per tooth. This might seem time-consuming, but thorough cleaning prevents potential long-term dental issues. Move your brush systematically around your mouth, ensuring no area is overlooked. Pay special attention to the areas directly above and below each bracket, where food particles tend to accumulate.
Strategic Brushing Approach
Follow these essential brushing steps for comprehensive cleaning:
- Begin with outer tooth surfaces, using circular motions
- Clean inner tooth surfaces with the same gentle technique
- Brush chewing surfaces thoroughly
- Spend extra time around brackets and wire connections
- Use short, gentle strokes to avoid damaging braces
When brushing around braces, use light pressure to prevent bending wires or dislodging brackets. Your electric or manual toothbrush should glide smoothly, with bristles carefully navigating around orthodontic hardware. Consider using an interdental brush to reach tight spaces between brackets that your standard toothbrush might miss.
After completing your brushing routine, rinse your mouth thoroughly and inspect your braces in a mirror. Your teeth should look clean, with no visible food particles or plaque around brackets. The metal or ceramic hardware should appear bright and free from debris. By dedicating time to this meticulous cleaning process, you’re protecting your investment in orthodontic treatment and maintaining optimal oral health.

Step 4: Use Floss or Interdental Cleaners for Gaps
Flossing with braces presents unique challenges that require specialized techniques and tools. This critical step ensures that areas between teeth and around orthodontic hardware remain clean, preventing plaque buildup and potential tooth decay. Learn more about comprehensive oral hygiene for braces patients to enhance your understanding.
Selecting the Right Flossing Tools
Traditional flossing becomes more complex with braces, making floss threaders your most valuable tool. These thin, flexible plastic tools help you navigate dental floss underneath orthodontic wires, accessing spaces that would otherwise remain unreachable. Begin by cutting a manageable length of floss, approximately 18 inches, which provides enough material to work comfortably around your braces.
Insert the stiff end of the floss threader underneath the main wire, then thread your dental floss through its loop. Gently move the floss up and down between teeth, being careful not to apply excessive force that might damage brackets or wires. Work systematically, cleaning between each tooth and along the gumline to remove trapped food particles and prevent bacterial growth.
Advanced Flossing Techniques
Consider these essential strategies for thorough interdental cleaning:
- Use waxed floss to prevent snagging on brackets
- Employ slow, gentle motions to protect orthodontic hardware
- Clean beneath the main wire for each tooth section
- Utilize interdental brushes for wider spaces
- Rinse with water after completing flossing
Alternatively, consider using specialized orthodontic floss with rigid ends designed specifically for navigating around braces. These products often come with built-in stiffeners that make threading under wires easier. Interdental brushes can also complement your flossing routine, providing additional cleaning in tight spaces where traditional floss might struggle.
After completing your flossing routine, rinse thoroughly and inspect your teeth and braces in a mirror. Your goal is to see clean interdental spaces without visible food debris or plaque. The process might feel time-consuming initially, but with practice, you’ll develop a quick and efficient technique that protects your dental investment and maintains optimal oral hygiene throughout your orthodontic treatment.
Step 5: Rinse Again for a Fresh Finish
The final rinsing step serves as a crucial checkpoint in your braces cleaning routine, removing any remaining debris and providing an extra layer of protection for your teeth and orthodontic hardware. This concluding process ensures a comprehensive clean and leaves your mouth feeling fresh and rejuvenated. Discover more about maintaining optimal oral hygiene with braces.
Selecting the Right Rinsing Solution
Choose a specialized orthodontist-recommended fluoride mouthwash for this final rinse. These formulations offer additional protection against tooth decay and help strengthen tooth enamel, which is particularly important when wearing braces. Avoid alcohol-based mouthwashes, as they can dry out your mouth and potentially irritate sensitive oral tissues. Pour the recommended amount into a clean cup, ensuring you use the precise quantity suggested by the product instructions.
Take a moderate mouthful of the rinse and swish it thoroughly throughout your mouth. The goal is to create a comprehensive cleaning motion that reaches every corner of your oral cavity. Tilt your head slightly to allow the liquid to flow around brackets, wires, and between teeth. Move the liquid using gentle circular motions, ensuring it passes through and around all orthodontic hardware.
Comprehensive Rinsing Techniques
Follow these strategic rinsing guidelines for maximum effectiveness:
- Swish mouthwash for at least 30 seconds
- Focus on creating circular motion around brackets
- Tilt head to ensure complete coverage
- Spit out rinse completely
- Avoid eating or drinking for 30 minutes after rinsing
Pay special attention to areas around brackets and underneath wires where food particles and bacteria tend to accumulate. The fluoride in the mouthwash provides an additional protective barrier, helping to prevent potential tooth decalcification and white spot lesions that can occur during orthodontic treatment. After spitting, resist the urge to immediately rinse with water, as this allows the fluoride to continue protecting your teeth.
Finish by examining your braces in a mirror. Your mouth should feel clean, with no visible debris or residue around brackets. The fresh sensation indicates a successful cleaning routine that protects both your teeth and orthodontic investment. Consistent, thorough rinsing is your final defense against potential dental complications during orthodontic treatment.
This summary table provides an at-a-glance overview of each step in the braces cleaning process, helping you understand the main goal and special tips for every stage.
| Step | Main Goal | Key Tip |
|---|---|---|
| Gather tools | Prepare all supplies needed | Use travel-sized tools for on-the-go cleaning |
| Rinse mouth and braces | Dislodge loose food particles | Tilt head to help water reach tricky areas |
| Brush teeth and braces | Remove plaque and debris | Use 45-degree angle with gentle strokes |
| Floss or clean between teeth | Clean spaces wires can hide debris | Use floss threaders or interdental brushes |
| Final rinse with fluoride mouthwash | Provide added protection and freshness | Avoid food or drink for 30 minutes after rinse |

Ready for Healthier Braces and a Brighter Smile in Edmonton?
Cleaning braces can feel overwhelming. Even with the right steps and tools, plaque and trapped food can still lead to discomfort and dental issues. It takes more than just routine at-home care to keep your orthodontic investment protected and your smile healthy. If you feel unsure about your cleaning technique or are struggling with hard-to-reach spots, expert help can make a real difference.

Let the caring team at Unity Square Dental guide you through your orthodontic journey. We provide hands-on coaching and advanced solutions for cleaning around brackets and wires, customized to your needs. Experience our state-of-the-art technology, wheelchair-accessible clinic, flexible scheduling, and gentle, family-centered approach. Want professional support? Book your appointment today so you can achieve the healthiest, brightest smile possible without missing a step. Your braces deserve the best care—start with us now.
Frequently Asked Questions
How often should I clean my braces?
You should clean your braces at least twice a day—once in the morning and once before bedtime. It’s also beneficial to rinse your mouth after every meal to prevent food particles from accumulating.
What tools do I need to clean my braces effectively?
To clean your braces, gather a soft-bristled toothbrush, fluoride toothpaste, interdental brushes or proxy brushes, orthodontic floss threaders, and a compact mirror for thorough inspection.
What is the best way to brush my teeth with braces?
Brush your teeth with braces by positioning your soft-bristled toothbrush at a 45-degree angle to the gumline, using gentle circular motions. Focus on cleaning around brackets as well as along the gumline and tooth surfaces.
Can I use mouthwash to help clean my braces?
Yes, a fluoride mouthwash can be beneficial after brushing and flossing. It adds an extra layer of protection against cavities, but avoid alcohol-based mouthwashes as they can be harsh on sensitive oral tissues.

